I made a custom cruiser last year for a client in Vancouver.
The bike started out as a Kona 88 stock cruiser.
I spent approx 6 months working on this project
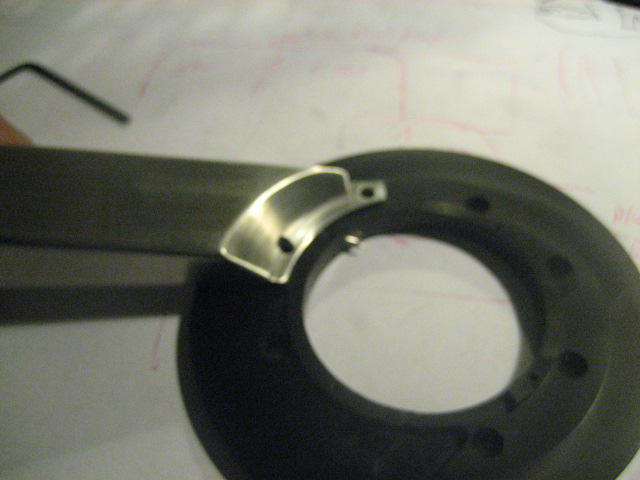
The intent was to build a bike that had a leaned back feel while in the saddle but that you could still hammer on if you needed to. I choose a shimano nexus 7 speed rear hub for the back and a Maillard for the front.
Originally I was going to make the front
hub but the client had a sentimental
attachment to the Maillard hub so it won
in the end.

Aside from the obvious....rims, saddle, tires, grips, etc
I machined every component for this bike on my
manual mill and lathe..... Oldschool style......except
for the fact that they were all designed in 3d
modeling software first.


The fork travels on 8 sealed bearings commonly used in bmx cassette hubs. 4 bearings in each linkplate, 2 on each pivot axle.It also features an innovative " no steerer tube" design that has the headset bearings pressed into the crowns instead of the cups.
This was done so that from the riders point of view you can see down through the top of the
fork and to the tire.

Suspension was handled by a ROCKSHOX air shock mounted on top of the leading link.

The handlebars are machined from 6061 T-6 aluminum and integrated into the top crown of the fork. No brake cables or shifter on the bars gives the bike a clean look.

Thanks to Russel for the design influence.


I machined a Jocky shifter housing for the downtube. The stock shimano Nexus shifter was modified and placed inside of the housing to provide a fully functional 7 speed shifter. Serving as a handle on the top of the shifter is a large version of a standard bicycle axle nut machined from delrin. The nexus rear hub is equipped with a coaster brake.
I had done some preliminary concept sketch's while pitching the design to my client and had played around with the idea of stretching the rear end out. In the end, he really like the idea and I machined a set of plates to stretch the rear end out 4". It worked out nicely as I was able to machine the inside of the driveside plate to accommodate the nexus hub.

A few years back over beers a good friend and I had come up with an idea for a crank / pedal threadless interface. I took this build as an opportunity to try it out.

The crank arms feature a clamping design similar to what Quamen first came out with last year. Full respect due to Quamen aswell, I just used the design for a cool oneoff.
The arms feature a compression screw inbound in the crank arm for tightening to the bb spindle.
The pedal axles are machined with a 1 degree taper that fits into a mating taper in the crankarm. Assembly is done via a pull screw from the backside of the crankarm. The pedals rotate on delrin bushings, no sealed bearings.

The seatpost in my opinion was the least fitting part of the overall build visually. I found that I couldn't come up with a design which made the seat blend in and look good while on its own, and
at the same time also felt good for riding. In the end I built 3 different designs and the client felt this one provided the best riding position. Although it may look a little funny, once you throw a leg over and go for a spin, you'll find that it rides great. Its a very comfy ride. Heres a picture of my 68 year old landlord going for a spin a few weeks after knee surgery to prove it.

You may also notice the lack of any welding on the handlebars and seatpost. This was a design criteria from the get go. My client liked the idea of a fully mechanical approach. Sure welding is the obvious choice, but this bike was built to catch peoples eye. The large fasteners used to fix the various components together do just that.
This bike amounts to approx $6000 worth of custom design and machining, but by far the coolest feature is that 3 cans of beer fit into the gas tank, and are easily accessible with with the supplied lock and key........"No Officer, I dont have any beers in my backpack"...haha
All parts were hand polished to a mirror finish and the frame was powder coated by Rainbow powder coating in Port Coquitlam BC


If your SERIOUSLY interested in comissioning a fully custom built bike for yourself or to promote your business drop me a line.

 I just put a deposit on this new milling machine.
 Here are some pictures of an RC car rear view mirror that I developed for a client.
 12 parts are cut of in one setup. The parts are now ready for machining of the backside.
 Fresh of the saw
 Facing the backside
 All faced and ready for the next operation
 Drilling the mounting hole to prep for threading
 Power tapping on my small tapping machine.
 Loaded into a fixture to gang machine the angled cut on the end of the mirror
 Into another fixture for another angled cut
 The fixture on its own


 I made a custom cruiser last year for a client in Vancouver.

 The fork travels on 8 sealed bearings commonly used in bmx cassette hubs. 4 bearings in each linkplate, 2 on each pivot axle.It also features an innovative " no steerer tube" design that has the headset bearings pressed into the crowns instead of the cups.
 Suspension was handled by a ROCKSHOX air shock mounted on top of the leading link.


 I machined a Jocky shifter housing for the downtube. The stock shimano Nexus shifter was modified and placed inside of the housing to provide a fully functional 7 speed shifter. Serving as a handle on the top of the shifter is a large version of a standard bicycle axle nut machined from delrin. The nexus rear hub is equipped with a coaster brake.
 The crank arms feature a clamping design similar to what Quamen first came out with last year. Full respect due to Quamen aswell, I just used the design for a cool oneoff.


 il.com